Thursday 29 April 2010

Banana bundt cake

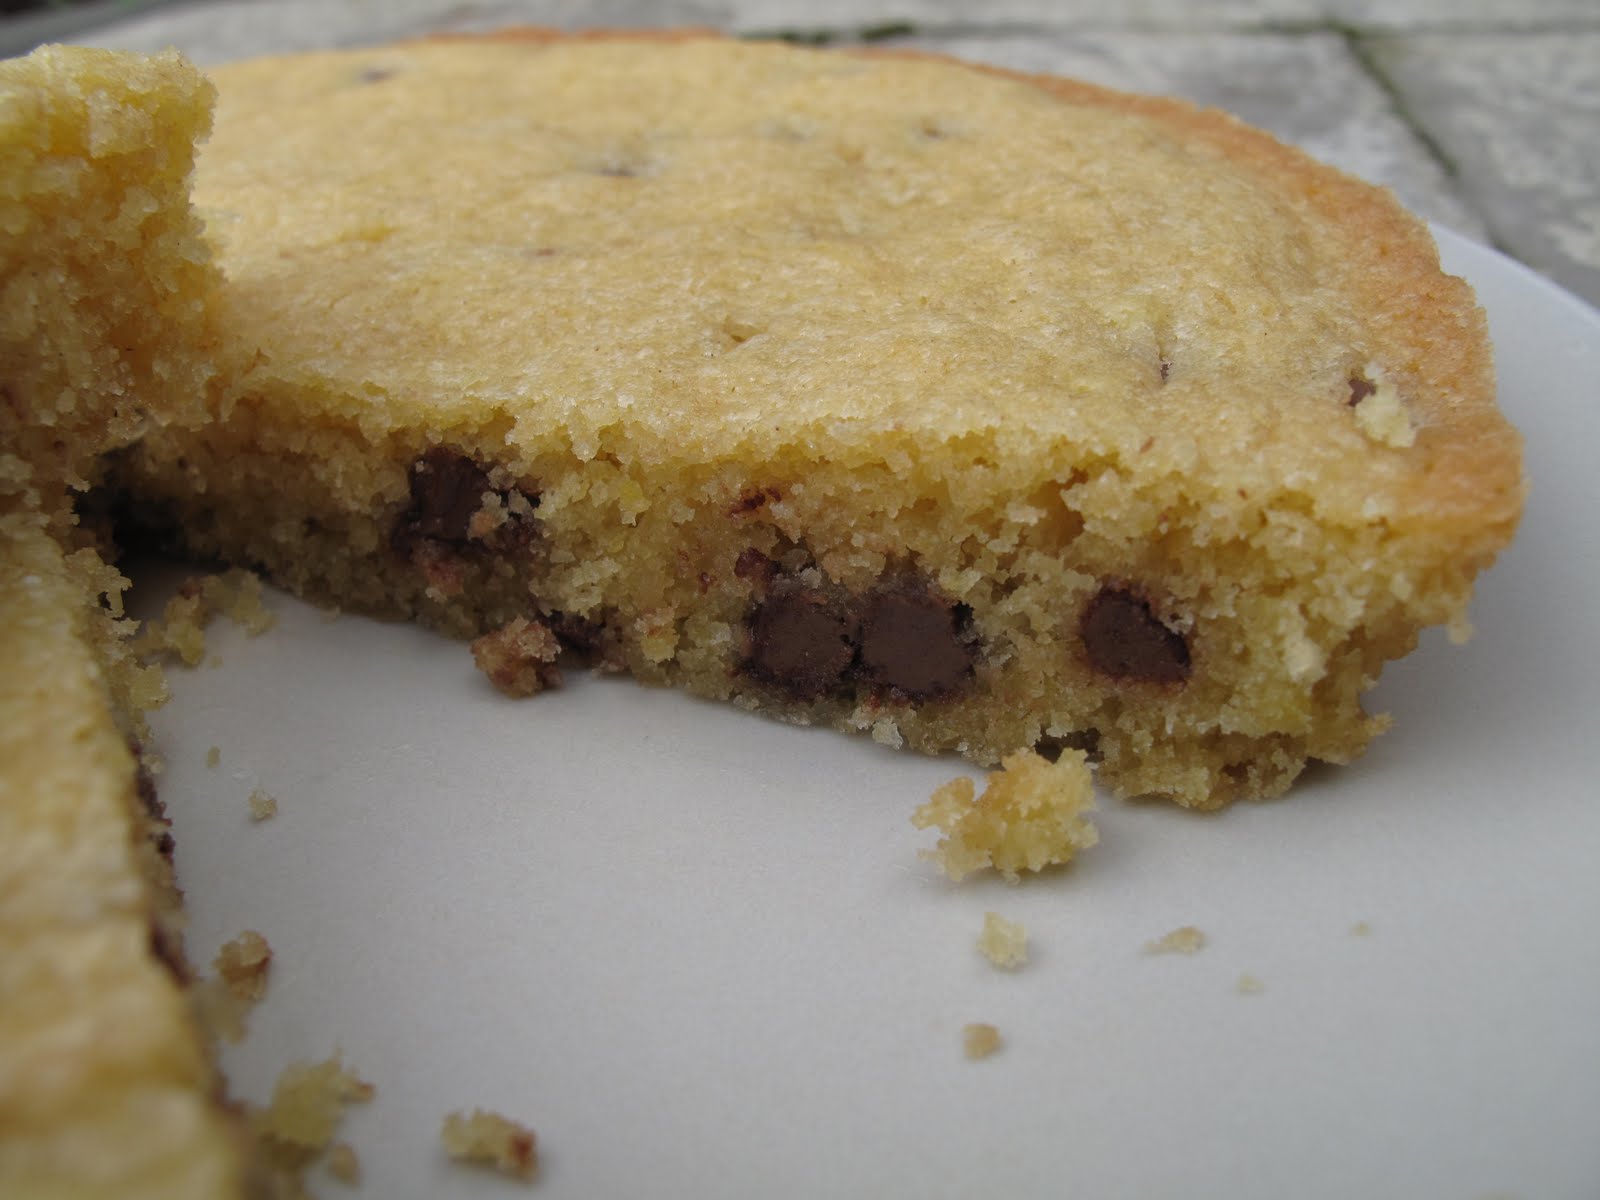
I'm still obsessed with the bundt tin! The cakes that come out are so pretty! I'm actually surprised that the cakes don't stick to the pan are just slide out really easily. Hope I just didn't jinx myself. I made banana bundt cake using Dorie Greenspan's recipe taken from slowlikehoney. Most people say that banana cakes are better on the second day but I had a slice about an hour after the cake came out of the oven and it's so moist!

The banana cake is so solid and heavy! I couldn't help but weigh it and it's nearly 2kg! Definitely need to get mini bundt tins. It's funny how you get dark specs in the cake from the banana - makes it look so pretty!
I followed the recipe and even used sour cream. I have never used sour cream in baking and was debating on whether I should replace the sour cream with yogurt. I'm not a fan of sour cream apart from sour cream and chives flavoured crisps and biscuits. Actually, the reason why I used sour cream is cause yogurt comes in 500g and sour cream in 300g. I didn't want any leftovers so I just used the entire pot of sour cream.
I added slightly less than the 1 1/2 cups of sugar. Think I'll cut down the sugar by a 1/4 cup next time. I also used about 2 cups of mashed up banana. The cake was browning really quickly and after about 35 minutes, I covered the cake in the oven with a piece of foil. Mine took about 65 minutes to bake.

Banana bundt cake
makes one 9 to 10 inch bundt cake

3 cups all-purpose flour
2 tsp baking soda
1/2 tsp salt
8 oz butter, at room temperature
1 1/2 cups sugar
2 tsp pure vanilla extract
2 large eggs, at room temperature
4 very ripe bananas, mashed (should make 1 1/2 – 1 3/4 cups)
1 cup sour cream

1. Center a rack in the oven and preheat to 180 C. Generously butter and flour a 9- to 10-inch (12 cup) bundt pan. (If you use a silicone bundt pan there’s no need to butter it.) Don’t place the pan on a baking sheet – you want the oven’s heat to circulate through the bundt’s inner tube.
2. Whisk together the flour, salt and baking soda.
3. Beat the butter until creamy. Add the sugar and beat till pale and fluffy.
4. Beat in the vanilla and add the eggs one at a time, beating for about 1 minute after each egg goes in. Reduce the mixer speed to low and mix in the bananas. Finally, mix in half the dry ingredients (don’t be disturbed when the batter curdles), all the sour cream and then the rest of the flour mixture.
5. Pour batter into the pan and rap the pan on the counter to debubble the batter and smooth the top.
6. Bake for 65 to 75 minutes or until a thin knife inserted into the centre of the cake comes out clean. Check the cake after about 30 minutes and if it's browning too quickly, cover loosely with a foil tent.
7. Transfer the cake to a rack and cool for 10 minutes before unmolding onto the rack to cool to room temperature.

Wednesday 28 April 2010

Peanut butter bars

These peanut butter bars are a huge YUMM. I did overdose on them and regretted eating too many of them later on but thinking back it was totally worth it! The recipe from cooking on the side called for a 13x9 inch tin. I used a 9x9 inch tin just because I don't have a 13x9 inch tin and I prefer a thicker base. The slices look deceivingly tall but they're less than an inch high.
The bars turned out really rich, dense and fudgy. Very peanut buttery! Definitely recommend this recipe but only if you have backup when it comes to eating them. Will definitely make a different variation of this! Probably with a banana and jam filling. I cut down a fair bit on the sugar. I used a cup of sugar for the base and 1/2 a cup of sugar for the filling.

Peanut Butter Bars

makes one 9 inch cake

Crust

1/2 cup soft butter
1/2 cup peanut butter (smooth or chunky)
1 1/2 cups granulated sugar
1/2 teaspoon vanilla extract
1 1/2 cups all-purpose flour

Filling

2 eggs
2 tablespoons peanut butter (smooth or chunky)
1/2 cup granulated sugar
1/2 cup packed brown sugar

1. Preheat oven to 185 C.
2. Mix butter, peanut butter and sugar. Stir in vanilla. Add flour and mix well. Reserve a cup of this mixture for the top.
3. Firmly press remaining mixture into bottom of greased baking pan.
4. Beat eggs, peanut butter and sugar together. Spread over unbaked crust. Sprinkle with reserved crust mixture. Bake for 20 minutes or until set and top is golden. Cool in pan and cut into bars.

Tuesday 27 April 2010

Mocha walnut marbled bundt cake


Y went to Oxford over the weekend and came back with a very pretty looking bundt tin! I was worried about the cake sticking to the tin but after a generous butter and flouring, it popped out effortlessly.

I'm not part of the Tuesdays with Dorie's baking group but after looking at the pictures of their cakes, I just had to make her Mocha walnut marbled bundt cake. I got the recipe from the pastry brush's site. Note to self - the top of the cake turns out to be the bottom of the cake. That slipped my mine when I was doing the swirly marbled pattern on the cake. When it came to unmolding the cake, I got really excited by the pretty bundt tin pattern but it was only when I was taking pictures that I realised there was no marble-y pattern on the top of the cake. At least there's a pretty chocolate wave at the side of the cake.
The recipe was straight forward and easy to follow. I was a bit disappointed with this cake. The cake was a bit on the heavy side.
Mocha walnut marbled bundt cake
makes one 9 or 10 inch bundt cake

2 1/4 cups flour
1/2 cup finely ground walnuts
1 tsp baking powder
1 tsp salt

8 oz + 1 oz butter (9 oz in total)
1 3/4 cups sugar
4 eggs
3 oz coarsely chopped bittersweet chocolate
1 tsp instant coffee
1/4 cup coffee
2 tsp vanilla
1 cup whole milk

1. Centre a rack in the oven and preheat the oven to 180 C. Butter the bundt pan, dust the inside with flour and tap out the excess. (If you’ve got a silicone bundt pan, there’s no need to butter or flour it.) Don’t place the pan on a baking sheet – you want the oven’s heat to circulate through the bundt’s inner tube.
2. Whisk together the flour, ground walnuts, baking powder, and salt.
3. Set a heatproof bowl over a saucepan of gently simmering water. Put 1 oz (2 Tbsp) of the butter, along with the chocolate, coffee and instant coffee. Heat the mixture, stirring often, until the butter and chocolate are melted and everything is smooth and creamy – keep the heat low so that the butter and chocolate don’t separate. Remove the bowl from the heat.
4. Working with a stand mixer, preferably with a paddle attachment or with a hand mixer in a large bowl, beat the remaining 8 oz of butter and the sugar at medium speed for about 3 minutes – you’ll have a thick paste; this won’t be light and fluffy. Beat in the eggs one by one, beating well after each addition. The mixture should look smooth and satiny. Beat in the vanilla extract. Reduce the mixer speed to low and add the dry ingredients and the milk alternately, adding the dry mixture in 3 portions and the milk in 2 (begin and end with the dry ingredients).
5. Scrape a little less than half of the batter into the bowl with the melted chocolate and, using a rubber spatula, stir to blend thoroughly.
6. If you want to go for the gingko pattern, scrape all of the white batter into the pan and top with the chocolate. If you want a more marbled pattern, alternate spoonfuls of light and dark batter in the pan. When all the batter is in the pan, swirl a table knife sparingly through the batters to marble them. (I used a chopstick to make the swirl pattern).
7. Bake for 65 to 70 minutes, or until a thin knife inserted deep into the center of the cake comes out clean. Transfer the bundt pan to a rack and let cool for 10 minutes before unmolding, then cool the cake completely on the rack. (Mine took 60 minutes to bake).

Monday 26 April 2010

Blondies

Saturday was such a sunny day in London. I actually found it warm and didn't have to wear a second layer for once. Sunday on the other hand was wet and gloomy. This was a random bake during the day just because I was stuck indoors. I usually bake in the morning when everyone else is sleeping in cause I'm an early riser.

I used this recipe from Mike Lesiuk as the ingredients were simple and it used melted butter so no creaming of butter and sugar by hand required. The only difference I made was I cut down the sugar and used 3/4 cup and I added 1/2 tsp of baking powder. Simply because I prefer a cakey cake to a fudgy one.

The batter looked like a softer version of chocolate chip dough. I overbaked the blondie. I think I left it in there for 25 minutes. This is what happens when you don't have a timer and you rely on checking the clock every few minutes. And on top of that, I always forget the time I put the cake in oven in the first place.
The blondie is nearly finished with little help from anyone else. To be fair, the blondie is fairly short; it IS half the height of a normal cake.
Blondies
makes one 8 inch cake

4 oz melted butter
3/4 cup brown sugar
1 egg
1 tsp vanilla
1/4 tsp salt
1 cup flour
1/2 tsp baking powder
1/2 cup chocolate chips

1. Mix melted butter and sugar.
2. Mix in egg. Then vanilla.
3. Sift in salt, baking powder and flour.
4. Mix in chocolate chips.
5. Bake in a preheated oven at 180 C for 20-22 minutes.

Saturday 24 April 2010

Earl grey chiffon cake

I've made chiffon cake before and they turned out okay I guess but this recipe from Happy Home Baking is absolutely delicious! I also just realised that I had previously presented the cake the wrong side up. The bottom/flat side of the cake is meant to be the top of the cake.
The aroma of earl grey filled the kitchen whilst the cake was in the oven. The earl grey taste is very distinct and the cake turned out light and fluffy. Will definitely use this recipe again but maybe make a different flavour like orange or lemon.
I remembered to take pictures for most of the steps! I got excited whilst taking pictures of the beating of the egg whites process. The only changes I made to the recipe was the addition of 1/4 tsp cream of tartar to the egg whites.

It's very important to make sure that the tube pan is grease free and dry when the batter is added to the pan.

Earl grey chiffon cake
makes one 7 inch diameter cake

A
3 egg yolks
30g caster sugar

50ml vegetable oil
75ml water

1 1/2 tsp baking powder
100g flour
1/2 tsp salt

1 Tbsp earl grey tea powder (3 sachets)

B
3 egg whites
40g caster sugar
1/4 tsp cream of tartar

1. Sieve flour, baking powder and salt together, set aside.
2. Separate egg yolks/whites and bring to room temperature.
3. Place egg yolks in a mixing bowl, add in sugar, in 3 separate additions and with a manual whisk, whisk till the mixture becomes sticky and turn pale.
4. Drizzle in the oil, whisking at the same time till the mixture is well combined. Repeat the same with the water. Sieve over the flour mixture and whisk until flour mixture is fully incorporated into the batter. Add in the earl grey powder and mix well.
5. In a clean, dry mixing bowl, beat egg whites with an electric mixer until mixture becomes frothy and foamy. Gradually beat in the sugar and beat on high speed until stiff peaks form. (I beat the sugar and cream of tartar with the egg whites from the start)
6. Add the beaten egg white into the egg yolk batter in 3 separate additions, each time folding gently with a spatula until just blended.
7. Pour batter into a 7 inch tube pan (do not grease the pan). Tap the pan lightly on a table top to get rid of any trapped air bubbles in the batter.
8. Bake in preheated oven at 170 C for 45 minutes or until the cake surface turns golden brown, and a skewer inserted into the centre comes out clean.
9. Remove from the oven and invert the pan immediately. Let cool completely before unmold. To remove the cake from the pan, run a thin-bladed knife around the inside of the pan and the centre core. Release the cake and run the knife along the base of the pan to remove the cake.

Friday 23 April 2010

Coffee walnut cookies

When I saw this recipe on the LA times, I knew I had to make it. The presence of coffee in a recipe outweighs my dislikes of walnuts. I don't exactly hate walnuts, it just doesn't appeal to me. Though I have to admit, the smell of roasted walnuts is quite fragrant. Actually, I take my dislikes of walnuts back. As long as they're incorporated with something else and not presented on its own, I'm okay with walnuts.

These cookies are delicious! The coffee taste isn't as strong though. I'd probably dissolve a teaspoon of instant coffee into the milk next time and roast the walnuts for longer.

I ground the walnuts on its own in a hand held blender cause I had a feeling (*that tonight's gonna be a good night*) that it wouldn't work once the flour and sugar is added. The Black Eyed Peas song always comes to mind when anyone says I had a feeling!

The original recipe contains brandy but I just substituted it with milk. I also wrapped the dough in parchment paper instead of clingfilm cause clingfilm and me don't work. Firstly, cutting the silly clingfilm is annoying and I somehow always end up with a ball of clingfilm which is impossible to spread out again. I also made mine rectangular instead of circular as per the LA times recipe.

I added an extra 1/2 tsp of finely ground coffee and only decorated a third of the cookies with the whole coffee beans.

Coffee walnut cookies
makes 85 cookies

2 cups flour
1 cup roasted walnut
3/4 cup sugar
1/4 tsp salt
2 1/2 tsp finely ground coffee beans (not espresso beans), plus whole beans for garnish
3/4 cup plus 2 Tbsp butter
1 Tbsp plus 1 tsp brandy (I used milk)
1 1/2 tsp vanilla extract

1. Place walnuts and pulse till finely ground in a food processor.
2. In a mixing bowl, mix the flour, ground walnuts, ground coffee, salt and sugar.
3. Cut the butter into cubes and rub in the butter into the dry ingredients until the mixture resembles breadcrumbs.
4. Mix in the vanilla extract and brandy/milk. Knead by hand till a dough is formed.
5. Form the dough into a log, wrap in parchment paper/clingfilm and refrigerate for at least 2 hours. I refrigerated mine overnight.
6. Using a sharp knife, slice the dough into 1/4 inch slices. Press a coffee bean into the centre of each cookie.
7. Bake in a preheated 180 C oven on parchment paper for 13-15 minutes or till light golden brown.
8. Let the cookies firm up slightly before transferring them to a cooling rack.

* I used the rubbing in method for the dough as my hand held blender refused to budge when I added the flour and sugar to the ground walnuts. Please refer to the LA times recipe for the food processor/pulsing method.

Thursday 22 April 2010

Lemon glazed madeleines

Y was showing me how madeleines are made. She used the lemon glazed madeleines recipe from David Lebovitz. Funny how the batter and pan needs to be chilled overnight. Y made the batter the night before and baked them the next morning. I sat in front of the oven whilst they baked and watched them rise in the oven. Apparently the bump on the madeleines are suppose to be pointy but hers came out round-ish. I think the round-ish bump looked quite nice.
The madeleines turned out to be super sweet cause of the glaze but they tasted good and look pretty so I'll definitely try making different flavoured ones.

Lemon glazed madeleines
makes 24 madeleines

3 eggs
2/3 cup caster sugar
1/8 tsp salt

1 1/4 cup flour
1 tsp baking powder

zest of one lemon
120g cooled melted butter

glaze
3/4 cup icing sugar
1 Tbsp lemon juice
2 Tbsp water

1. Brush the madeleine mold with melted butter and leave in the fridge to chill.
2. Whip the eggs, sugar and salt till frothy and thickened.
3. Sift dry ingredients and fold into egg mixture.
4. Add zest into melted butter and dribble butter into batter whilst stirring.
5. Chill batter for a couple hours.
6. Fill it 3/4s and do not spread the batter.
7. Bake in a preheated 200 C oven for 8-10 minutes.
8. Make glaze by whisking together ingredients.
9. When the madeleines are cool, dip in glaze and leave to dry on cooling rack.

Wednesday 21 April 2010

Snickerdoodles

I have always wanted to make snickerdoodles and always imagined them to be really sugary and cinnamon-y, kinda like the cinnamon cereal squares. They weren't. The cinnamon taste wasn't obvious and I don't think I coated them with enough sugar. They did however turn out to be rather pretty cookies, just like pictures from other blogs. This recipe is from smitten kitchen.

Y said that my snickerdoodles were tiny when she first saw them. I thought they were rather big cause two bites were required when eating my cookies. Aren't cookies supposed to be bite sized so technically mine should've been considered big?
I halved the recipe and ended up with about 40 cookies. My baking time was 13 minutes cause of the size of cookies. These cookies spread a fair bit so make sure they are spaced apart form each other when baking.
Snicker doodles
makes 80 cookies (depending on cookie size)

8 oz butter
1 1/2 cup caster sugar
2 large eggs
2 3/4 cup flour
2 tsp cream of tartar
1 tsp baking soda
1/4 teaspoon salt

2 tablespoons ground cinnamon
1/4 cup caster sugar

1. Cream butter with sugar.
2. Beat in eggs.
3. Sift in flour and mix till incorporated.
4. Roll into balls and roll into cinnamon and sugar mixture and press down slightly.
5. Bake in preheated 200 C oven for 13 minutes.


Tuesday 20 April 2010

Parmesan and thyme crackers

Y grows fresh lemon thyme in her mini garden. Actually, it's just a patch of grass and the lemon thyme, mint and lavender are sitting in a pot. I've been trying to convince her to dig up a patch to plant a peach or cherry tree or even flowers. Instead, she gives me permission to dig up a tiny 1.5 feet x 1.5 feet plot which isn't even affiliated with the grass bit and is about half a foot deep. I chucked some flower seeds in and there're some chili seeds there too. There was a silly cat that dug my little plot up too right after I'd planted it! Will take pictures after if and when the flowers grow.
The parmesan and thyme crackers from charmandsalt taste exactly like Cheddars! Actually I haven't had Cheddars in years but they do remind me of Cheddars. This recipe's definitely a keeper. I'd add more fresh thyme though cause I couldn't taste thyme in the biscuits. I halved the recipe and ended up with 16 two inch biscuits.

Parmesan and thyme crackers
makes 32 two inch biscuits

4 oz butter
3 oz grated parmesan
1 1/4 cup flour
1/4 tsp salt
1 tsp thyme (finely chopped)
1/2 tsp black pepper

1. Beat butter till soft.
2. Add in remaining ingredients.
3. Roll out and cut into shapes.
4. Prick with fork and bake in a 180 C preheated oven on baking sheets lined with parchment paper for 20-22 minutes.

The mixture turned out crumbly so I kneaded it for a bit by hand till a dough formed.

Monday 19 April 2010

Apple custard tea cakes

I was a bit disappointed with this recipe. Thought it required more apples. I still have 2 more sour apples on top of the 6 apples I got today. The recipe says 1 large apple. In my opinion, the size of my sour apple is small so technically I should've used at least 1 and a half apples. I still ended up having to eat about a quarter of the 1 apple that I used.

I can never fill up cupcakes with just the right amount of batter. It's always either too much or too little. 1 of them kinda leaked out; more of a semi leak cause it didn't overflow from all sides but just a corner and the other 5 sorta have the pointy shape in the centre which I'm not really a fan of. I like cupcakes that are slightly rounded. Well, from the pictures, they don't really look pointy cause it's hidden by the sliced apples but from the back, there's an obvious bump where the pointy bit was trying to form (refer to muffin at the top and the one on its left and right in the picture below. It's not that obvious cause of the angle but if you were to take a side profile, there's an obvious pointy bit!).
This recipe is from the Australian Women's Weekly-the complete book of cupcakes, cheesecakes and cookies, page 85. The bf got it for me before we left Wales for London and I pretty much spent the entire journey going back and forth between recipes and napping.

The apple custard tea cakes is basically batter, custard and batter. No pictures of the making process cause I basically chatting on the phone whilst making the batter and by the time I got off, I had already filled up the cupcake cases with batter.

The cakes were yummy when they just came out of the oven but Y said that it had gone a bit solid by the time she got back which was a couple of hours later. I'll definately try making this again but not with this recipe. I quite like the idea of a secret filling hiding inside.

Apple custard tea cakes
makes 6 muffins

for custard
1 Tbsp custard powder
1 Tbsp caster sugar
1/2 cup milk
1/4 tsp vanilla extract

for batter
90g butter
1/2 tsp vanilla extract
1/2 cup caster sugar
2 eggs
3/4 cup self raising flour
1/4 cup custard powder
2 Tbsp milk
1 unpeeled apple, cored, sliced finely

30g melted butter
1 Tbsp caster sugar
1/2 tsp ground cinnamon

1. Make custard according to instructions and leave to cool.
2. Preheat oven to 180 C and line muffin pan.
3. Beat butter, vanilla extract, sugar, eggs, flour, custard powder and milk until ingredients are combined. Increase speed to medium and beat until mixture is changed to a paler colour.
4. Divide half the mixture among cases. Top with a heaped Tbsp of custard and spread remaining batter to cover custard. Top with apple slices, pressing slightly into the batter.
5. Bake for 30 minutes.
6. Brush hot cakes with melted butter and sprinkle with combined sugar and cinnamon.

Note:
For the batter, I creamed the butter and sugar, incorporated the eggs and sifted in the flour but that's only cause I didn't read step 3. I also added an extra 1/2 tsp cinnamon to the batter.

Sunday 18 April 2010

Dinner - vege burgers and pizza

The mint plant in the garden which was planted a week ago is still alive! It's so pretty and green! I'm not really an outdoor-sy person but plants and flowers always seem to amuse and excite me. There's lavender in the same pot too. Will make some cookies with lavender sometime.


Today's dinner was absolutely yummy. Sweet potato, chickpeas and cumin burger with yogurt sauce and pizza with chorizo and zucchini. The vege burger's recipe was made up as I went along - a bit of this and that so excuse the measurements. The yogurt sauce is delicious and I ended up dipping everything in the yogurt, even the pizza. I also made a simple salad of mushrooms, tomatoes, cucumber and sun dried tomatoes drizzled with oil from the sun dried tomatoes and balsamic vinegar.

The pizza was made by my housemate with 2 types of cheese, chorizo and zucchini. Will post the recipe some other time. Yogurt sauce

500g greek yogurt
1/2 a cucumber
bunch of parsley
lemon zest
squeeze of lemon juice
salt and black pepper to taste (I used about a teaspoon of salt and quite a fair bit of black pepper)

Basically just chop the parsley, slice the cucumber thinly and mix everything together.

Sweet potato, chickpea and cumin burger

3 small sweet potatoes (boiled till tender)
1 can chickpeas
1 tsp ground cumin
1/2 red onion (diced)
1/2 tsp lemon juice
1 clove garlic
1 egg
3 Tbsp flour
1/2 cup bread crumbs
salt and black pepper to taste

extra bread crumbs to coat

1. Mash chickpeas and sweet potato. Add in all other ingredients.
2. Roll into balls and cover with breadcrumbs.
3. Flatten and refrigerate for 30 minutes.
4. Pan fry in oil till golden brown.


Related Posts with Thumbnails