Showing posts with label recipe. Show all posts

Thursday, 11 November 2010

Brewer's blondies

These blondies are so rich, fudgy and delicious! The fudgy bit was only in the middle bit and totally accidental. I took them out before they were done and the squares in the middle turned out fudgier than the edges.

Still good though, I mean, how can you go wrong with Maltesers and chocolate chips in a recipe. The blondies didn't turn out to be too sweet when they were warm but when cooled, they are a bit on the sweet side.

I found the recipe in an article reviewing a recipe book - Baked: New Frontiers in Baking. It's a really simple recipe - easy to follow. The only difficulty I had was trying to spread the batter which was really stiff and thick into the baking tray. It eventually flattened and evened out whilst in the oven.

I cut down on the brown sugar and upped the Maltesers, Horlicks and walnuts. Below are the changes made to the recipe.

Brewer's blondies
makes one 9x13 inch

200g butter at room temperature
1 1/2 cups brown sugar
1 tsp salt

2 eggs
1 tsp vanilla extract

2 1/3 cups flour
1 1/2 tsp baking powder
2 heaped Tbsp malt powder (Horlicks)

1 cup chopped Maltesers
1 cup chopped walnuts
1 cup chocolate chips

1. Preheat the oven to 175 C. Butter the bottom and sides of a 9-by-13-inch baking pan.
2. In the bowl of an electric mixer fitted with the paddle attachment, beat the butter , brown sugar and salt on medium speed until completely combined. Scrape down the bowl, add the eggs and vanilla, and beat until combined.
3. In a medium bowl, whisk the flour, baking powder and malted milk powder together.
4. Add the flour mixture in two batches until just combined. Add the malted milk balls, chocolate chips and walnuts and beat until just combined, about 10 seconds. The mixture will be thick. Turn the mixture out into the prepared pan and use an offset spatula to spread it evenly.
5. Bake in the center of the oven for 30 minutes, or until a toothpick inserted into the centre of the blondie comes out clean.

Sunday, 7 November 2010

Lentils

My first cooking post! Not that I don't cook, I just haven't really gotten excited about cooking. After Y mentioned something about green lentils, I decided to give it a try. I got a packet of green dried lentils and gave it a go. Not having done this before, I read the instructions on the back - boil rapidly for 10 minutes and simmer for 30 minutes.

I did look at a couple of recipes online too and cumin seemed like a common spice that everyone else used. I did the whole cooking shows style where I laid all my ingredients in front of me. For some reason, I took out a can of chopped tomatoes but decided against it halfway through.

Lentils are awesome! Reckon it's going to be my new phase. I went through a whole couscous phase where there was usually a container of some version of couscous in the fridge 3/7 days a week. Well, that was mainly cause I made a huge portion and it just lasted that long because everyone else got sick of eating it and it was down to me to finish it.
It was fairly simple cooking the lentils and for the other ingredients, I just added whatever vegetables I had in the fridge. There isn't really a fixed recipe so I'll just list down what I added to the pot.

Lentils

250g lentils

4 cloves garlic
1 onion
2 tsp cumin (ground with 1/2 tsp salt)
2 cm knob of ginger
a couple chopped up carrots
4 stalks of celery
1 stock cube
some cauliflower

I started off boiling the lentils on a high fire on its own whilst peeling and dicing the other ingredients. In a separate pot, I fried off the onions in a tablespoon of olive oil and grated in the garlic and ginger, then added the ground cumin and salt. Then added in the stock cube, celery and carrots and covered with about a cup of hot water. All of this took about 15 minutes and for some reason, I decided to drain the lentils (which was boiling away in another pot) and added it to the pot with the vegetables.

Now I'm not really sure why I decided to do this separately but it turned out alright so I suppose it works this way. I left it to simmer for another 20 minutes, added in the cauliflower, let it simmer for another 5 minutes and switched the fire off. Added a bit more salt and tadaa. Yummm.

It's absolutely delicious! I really like the cumin taste. And I've got a pot of it which would probably last 5 meals? Actually, thinking back, I know why I don't post about cooking. Pictures of cakes and biscuits look so much more appealing than a picture of lentils.

Thursday, 28 October 2010

Sweet potato chiffon cake

After seeing some pretty pictures of some purple sweet potato chiffon cake, I decided to give it a go. I couldn't find any purple sweet potato in the UK though so I just settled with some orange sweet potato. How boring and standard looking. Hmm, I wonder if beetroot would work in a chiffon cake?

I modified the earl grey chiffon cake recipe. Not by much though. Techniques are exactly the same so I suppose once you find a good chiffon cake recipe, all you have to do is substitute the ingredients and play around with them.
It's so cool how you invert the tin the second it comes out of the oven so that the texture remains light and spongy. I have to admit, I was really sceptical about it the first time I read the instructions. Do be careful as if the cake isn't cooked through, the whole cake topples out of the tin when inverted.
I did cut down on the sugar slightly. Just nice for my liking. Shame the sweet potato flavour wasn't too prominent. Maybe it'll stand out more if it were the purple sweet potato. Next of my list for chiffon cake flavours - apple or pear or maybe both.

Sweet potato chiffon cake
makes one 7 inch diameter cake

A
3 egg yolks
20g brown sugar

50ml vegetable oil
100g sweet potato (boiled and mashed with 5 Tbsp of milk)
zest of 1 lemon

1/2 tsp baking powder
100g flour
1/2 tsp salt

B
3 egg whites
40g caster sugar
1/4 tsp cream of tartar

1. Peel and cut sweet potato into chunks. Boil until cooked and mash with milk. Leave to cool.
2. Sieve flour, baking powder and salt together, set aside.
3. Separate egg yolks/whites.
4. Mix together egg yolks, oil, brown sugar and lemon zest.
5. Whisk the flour mixture and oil/egg yolk mixture until fully incorporated. Add in sweet potato and mix well.
6. In a clean, dry mixing bowl, beat egg whites, cream of tartar and sugar with an electric mixer stiff peaks form.
7. Add the beaten egg white into the egg yolk batter in 3 separate additions, each time folding gently with a spatula until just blended.
8. Pour batter into a 7 inch tube pan (do not grease the pan). Tap the pan lightly on a table top to get rid of any trapped air bubbles in the batter. 8. Bake in preheated oven at 170 C for 45 minutes or until the cake surface turns golden brown, and a skewer inserted into the centre comes out clean.
9. Remove from the oven and invert the pan immediately. Let cool completely before unmold. To remove the cake from the pan, run a thin-bladed knife around the inside of the pan and the centre core. Release the cake and run the knife along the base of the pan to remove the cake.

Sunday, 18 July 2010

Honey and walnut bread

After having walnut bread at various restaurants, I've been on the look out for a good/interesting walnut bread recipe. I ended up using britishlarder's recipe for spelt, honey and walnut bread.
I changed it slightly, adding a bit more honey and swapping spelt for strong wholemeal flour. The bread turned out delicious! The taste of the walnut is so distinct and honey - MMM. It's a simple recipe and the kitchenaid did most of the work. It looks so pretty after cutting the patterns on top and brushing the dough with egg yolk.
The bread when warm has a crunchy outside and a soft inside. Delicious even on its own. Definitely a keeper. It didn't even take too long to make. Apart from waiting for the dough to double in size.

Honey and walnut bread
minor changes made below - do refer to britishlarder for original recipe
makes 2 loaves

250g strong white flour
250g strong wholemeal flour
10g table salt
7g dried yeast
2 Tbsp honey
260ml warm water
150g walnuts

1 egg yolk

1. Place yeast, 50g flour and honey in a small mixing bowl and add 50g of the water, mix well, cover and leave to prove for 30 minutes in a warm spot until the mixture starts to bubble.
2. In the bowl of a mixer add the remaining flour, bubbling yeast mixture, walnuts, salt and the remaining water together. Attach the dough hook and mix the bread dough on slow speed for 10 minutes.
3. Grease a large mixing bowl. Once the dough is ready turn it out onto a lightly floured work surface and shape the bread dough into a smooth ball. Place the smooth bread dough into the greased mixing bowl and cover the bowl with a clean dry tea towel. Leave to prove until the dough has risen to double in size.
4. Preheat the oven to 200°C and dust two baking sheets with flour, set aside.
5. Gently turn the bread dough out onto a lightly floured work surface and divide the dough into even size dough balls.
6. Roll each ball into a evenly shaped smooth ball, place each ball onto the dusted floured tray and cover gently with cling film or a clean dry tea towel and leave it to prove for the second time until nearly double in size. Brush the risen bread carefully with the egg yolk and use a knife to make small cuts at the top of the risen bread.
7. Place the baking sheets in the preheated oven and pour 100ml of cold water directly onto the floor of the oven and shut the door quickly. The water will give a burst of steam that will help the loaves to puff and form a lovely crust.
8. After about 10-12 minutes, place a sheet of foil over the bread if it is browning too quickly.
9. Bake the loaves for 35 - 40 minutes, give the bread a tap at the bottom and if it sounds hollow it means the bread is cooked, place the bread onto a cooling rack and leave to cool completely.

Saturday, 10 July 2010

Calzone

Calzone - YUMMYYY!! I have never used a recipe from the BBC website but I gave this one ago because (a) the recipe uses milk and that sounded interesting and (b) it was the first site to pop up when googled searched. The dough was soft and easy to work with - slightly sticky at times but I just sprinkled flour on the work surface. It was really easy rolling out the dough thinly. It didn't seem as though it would be nice the next day as leftovers but we wouldn't know as Y and I finished all 4 calzones.
I know it says meat feast calzone and I'm not really a person so I ended up just using the dough recipe and making my own filling. For the filling, I just stir fried some onions, garlic, mushroom, carrots, brocolli, capers and some dried basil. Leave to cool and when it's time to fill the calzone, put a heap of filling and loads of shredded cheddar cheese on top. Next time I'll probably add black olives to the filling. I suppose you can use anything as long as the filling isn't too watery.
Y had some leftover strawberries so I cooked them in a pan with sugar and some other frozen fruits i.e.blueberries, blackberries etc. I used a bit of cornflour dissolved in water to thicken it up. Dessert calzones - delicious with ice cream.

I did end up with way too much filling which kept falling out whilst eating it. Actually, I ended up eating the filling on its own and eating the bread with ice cream.
Calzone
minor changes made below - do refer to meat feast calzone of the BBC for the original recipe
makes 4 descent sized calzones

8 oz strong white flour, plus more for dusting
90 ml warm milk
50 ml room temperature water
1 tsp instant yeast
1 tsp olive oil
1/2 tsp salt
1 tsp sugar

1. Mix the milk, water, sugar and yeast together in a separate bowl.
2. Sift the flour and salt into a bowl.
3. Using a mixer with the dough hook attachment, add the yeast mixture to the flour and mix together on medium speed.
4. Scrape down bowl and add in 1 tsp of olive oil.
5. Continue mixing on medium speed for 3-4 minutes.
6. Cover the bowl with cling film and leave somewhere warm for 2 hours.
7. Divide the dough into 4 equal portions and roll into balls.
8. Place each ball onto a floured work surface and roll out into 8-9 inch circles.
9. Place filling onto one half of each dough circle and cover with shredded cheese, leaving a 1 inch gap around the edge.
10. Fold the sides over to cover the filling and pinch the edges to seal.
11. Preheat oven to 210 C. Place a baking sheet in the oven to preheat.
12. Brush the calzones with vegetable oil/olive oil and place the calzones onto the preheated baking sheet and transfer to the hot oven to bake for 8-10 minutes, or until the dough is cooked through.

Tuesday, 6 July 2010

Earl grey chiffon cake 2

This cake recipe is definitely a keeper. This is my second time making an earl grey chiffon cake and this time, I added in the zest of an orange. I'll probably use some lemon zest next time.

I really like the lightness and texture of this cake and the cake is so easy to make especially when you're out of butter and running out of flour.
To think, I used to be intimidated by the idea of folding in egg whites.

Saturday, 3 July 2010

Orange bundt cake

Have a couple leftover oranges - make orange bundt cake! It's a really simple recipe, similar to the lemon bundt cake made previously. The orange taste is so prominent due to the zest of 3-4 oranges.
The texture of the cake is moist, not dense or oily and when warm, the crust is crispy. YUMM. I even made a not so watered down icing and the result - a really pretty looking cake. The zest of an orange in the icing added a nice touch too. I ended up with too much icing/glaze. Taking into account the amount that drips off the cake.
I used the recipe from sugar&spice by Celeste. I left out the cardamom, cinnamon, lemon and cut down on the baking powder. Below are the changes I made to the Orange Cardamom cake.

Orange bundt cake
makes one 9 to 10 inch bundt cake

3 cups all-purpose flour
1 1/2 cups sugar
1 tsp baking powder
1/2 tsp salt
3/4 cup fresh orange juice
2/3 cup vegetable oil
zest of 3-4 oranges (basically the zest of oranges squeezed to get juice)
1 tsp vanilla extract
3 large eggs (I used 4 medium sized eggs)

Glaze:
1 cup powdered sugar
10 tsp fresh orange juice (I ended up using about 10 tsp orange juice)
zest of an orange

1. Preheat oven to 180 C. To prepare cake, coat a 9 to 10 inch bundt pan with cooking spray or butter; dust with flour. Set aside.
2. Combine dry ingredients - sugar, flour, baking powder and salt.
3. In a separate bowl, combine wet ingredients - orange juice, oil, zest, vanilla extract and eggs.
4. Pour wet ingredients into dry ingredients on low speed until combined, scraping sides of bowl occasionally.
5. Spoon batter into prepared cake pan, spreading evenly.
6. Bake at 180 C for 50-55 minutes or until a skewer inserted in centre comes out clean.
7. Cool in pan for 5 minutes on a wire rack and then remove.
8. To prepare glaze, combine 1 cup of powdered sugar and 6 tsp orange juice in a small bowl, stirring well with a whisk or fork. Add in remaining orange juice a tsp at a time till correct consistency is obtained. Drizzle glaze over warm cake; cool cake completely on wire rack.

Saturday, 26 June 2010

Cheese tarts

I'm not sure what exactly to call these. They're cheesecakes made in a tart form so they're either cheesecake tarts or cheese tarts. The best part of these tarts - the crust layer is as thick as the cheese layer. I'm not too fond of a cheesecake where there's way more cheese than crust. The dough for the crust isn't really a dough. It looked more like breadcrumbs. No rolling out was required - just pressing it into the tin. They did puff up a bit in the oven and when they came out, I used a fork to press the puffy bits down. It's all good.
The bf got me some tart tins a while back and they're amazing! All 6 cheese tarts slid right off the tin with hardly any effort required but to be fair, I did butter them quite a fair bit.

I made a mistake whilst making these. I put the fruit (frozen cherries and blueberries) in the tarts before pouring the cheese layer on. Note to self - cheese layer first, then fruits on top. I'll try using mascarpone or a gelatine cheese recipe next time.

Again, I can't remember where I got this recipe from.

Cheese tarts
makes six 4 inch tarts

Crust layer

6 oz butter
1/4 cup brown sugar
1 Tbsp white sugar
2 heaped tsp honey
1 1/4 cup flour
1/4 cup wholewheat flour
1/2 tsp salt
1/2 tsp cinnamon

1. Preheat oven to 170 C. Butter tins.
2. Cream butter and sugars till light and fluffy.
3. Add in flours, salt, cinnamon and honey.
4. Mixture will appear to be crumbly. Press into buttered tins.
5. Place tart tins onto a baking sheet and bake for 18 minutes.

Cheese layer

8 oz cream cheese (room temperature)
2 Tbsp caster sugar
1 egg
zest of an orange
1/2 Tbsp orange juice
1/2 Tbsp flour

1. Using a mixer, mix cheese and sugar till smooth and creamy. Add in all other ingredients.
2. Pour cheese mixture into baked crusts and arrange fruit.
3. Bake in a preheated 170 C oven for 15 minutes.

Wednesday, 23 June 2010

Sweet potato bundt cake

This cake is delicious! Who would have thought - making a cake out of sweet potato. It has a tiny hint of sweet potato flavour and it goes perfectly with cinnamon. I just made this cake this afternoon and it's really easy to make. A mixer isn't even required.
I had many slices whilst it was still warm and it has a lovely/interesting texture especially when you bite into a walnut. It goes perfectly with vanilla ice cream too. I can't remember where I got this recipe from but it is modified from a couple recipes.

I sliced a medium sized sweet potato (~700g pre-cooked) into chunks and boiled them till soft (i.e. easily pierced by a fork) and mashed it up. Set it aside and leave to cool before using it.

Sweet potato bundt cake
makes one 9 to 10 inch bundt cake

2 cups mashed sweet potato (leave to cool - I used it when it was a bit warm)
1 cup oil
4 eggs

2 3/4 cups all purpose flour
1 tsp salt
1 tsp baking soda
1 tsp baking powder
1/2 cup caster sugar
1 cup brown sugar
2 tsp cinnamon

1 cup chopped raw walnuts

1. Preheat oven to 170 C. Butter and flour the bundt pan.
2. In a large bowl, sift the flour, salt, baking soda, baking powder and cinnamon. Mix in both the sugars.
3. In a separate bowl, mix together the sweet potato, eggs and oil.
4. Pour the wet ingredients into the dry ingredients and mix till combined.
5. Stir in the walnuts.
6. Pour batter into prepared pan and bake for 55-60 minutes or until a thin knife inserted into the centre of the cake comes out clean.
7. Transfer the cake to a rack and cool for 10 minutes before unmolding onto the rack to cool to room temperature.

Thursday, 10 June 2010

Monkey bread

This bread is amazing and so easy to make! And I love how the whole house smells of cinnamon whilst the bread is baking in the oven. Mmm. We ate them whilst they were still warm and nearly finished the entire thing!
I used Martha Stewart's recipe and didn't bother with the icing as the sweetness level was way high as it is. I didn't add any nuts as well, I like to stick to just plain cinnamon and sugar. The recipe is really easy to make. With the kitchenaid, there wasn't much work that needed to be done. Apart from 'rolling' the dough into balls. I didn't bother with the rolling into balls. I just tore the into small bits. The most time consuming part is dipping the individual dough pieces into butter and coating them in the sugar/cinnamon mixture.
It doesn't look too appealing when they first come out of the oven but when you turn it over, the actual gooeyness of the top is so pretty! I waited about 15 minutes before turning it out. Didn't want it to cool in the pan and solidify. It came out really easily. I didn't even have to knock it. Just put a plate on the pan and turn it around.

Monkey bread from Martha Stewart
makes one bundt tin

For the dough

2 Tbsp butter, plus more for pan
1/4 cup warm water
1/4 cup caster sugar, plus a pinch for yeast
1 envelope instant yeast (mine was 7g a sachet)
3/4 cup warm milk
1 tsp salt
3 1/4 cups all purpose flour
1 large egg

For the coating
4 oz melted butter
3/4 cup light brown sugar
2 tsp ground cinnamon (I used 3 tsp)

1. Lightly coat a 10-inch Bundt pan and a medium bowl with shortening; set aside. Put the warm water and a pinch of sugar in a small bowl; sprinkle yeast over top. Stir; let the yeast soften and dissolve, about 5 minutes.
2. Place the 2 Tbsp of butter, milk, sugar, salt, and egg in the bowl of an electric mixer fitted with the dough hook.
3
. Add yeast mixture to shortening mixture, and beat to combine. Slowly add flour. Knead on medium-low, 1 minute. Transfer dough to the prepared bowl. Cover with plastic wrap, and let stand in a warm place, 20 minutes.
4. Make coating: Place melted butter in a bowl. In a second bowl, combine brown sugar and cinnamon.

5. Cut dough into 1/2-inch pieces. Roll into balls. Coat in butter, then roll in nut mixture, and place in prepared pan. Cover with plastic wrap, and let stand in a warm place until doubled in bulk, about 1 hour.

6. Preheat oven to 180 C. Bake, 30 to 35 minutes (mine took 32 minutes). Let cool in pan for 15 minutes. Invert onto a serving plate, and let cool 20 minutes more.

Wednesday, 9 June 2010

Wedding cake v1.0

Trial version 1.0 of the wedding cake. Result - FAIL! Cake wise it was delicious but decoration wise - definitely a FAIL. First mistake - not having enough buttercream frosting to cover the cake. Second mistake - not having enough fondant to cover the cake.
It does look pretty though when you slice it and have a slice view. In general, from the top view it looks okay but from the sides, just plain hideous. I suppose the top wouldn't matter too much cause I'll be covering it with fresh flowers.
I don't really like the taste of fondant. I used the already made one. It tastes not really like food, more like plastic actually. I'll definitely need a thicker layer of frosting between the cake layers.

The chocolate layer cake is from Martha Stewart (minus the frosting). Really easy recipe and it's baked in one 8 inch baking tin. The cake was too dense and heavy for my liking though. The vanilla layers were from my previous post on vanilla cupcakes. Minus the lemon zest simply because I had no lemons. I'll probably use the vanilla cupcake recipe for the chocolate layer and just add a few tablespoons of cocoa powder.

Or maybe try out a whole different recipe for all the layers because the vanilla layer did shrink from the sides and wasn't too straight.

Easy chocolate cake from Martha Stewart
makes one 8 inch cake

6 oz butter
1 cup sugar
3 large eggs
1 tsp vanilla extract
3/4 cup cocoa powder
3/4 cup all purpose flour
1/2 tsp baking powder
1/4 tsp salt
1/2 cup sour cream

1. Preheat oven to 180 C. Butter an 8-inch round cake pan; line bottom with wax paper. Butter paper; dust with cocoa powder, tapping out excess; set aside (I didn't bother with this. I just buttered the pan, didn't even line it with baking paper and had no problems removing the cake).
2. In a medium bowl, sift together cocoa, flour, baking powder, and salt; set aside. In a mixing bowl, cream butter and sugar until light and fluffy. Beat in eggs, one at a time, then beat in vanilla. Reduce speed to low. Add flour mixture alternating with sour cream, starting and ending with the flour mixture.

3. Spread batter into prepared pan. Tap pan firmly on counter top several times to force out large air bubbles. Bake until a toothpick inserted in center comes out clean, 30 to 35 minutes. (mine took 38 minutes to bake). Remove from oven, Cool 10 minutes in pan, then invert onto a wire rack to cool completely (bottom side up).


Wednesday, 2 June 2010

Sausage bun v2.0

The mini hiatus is basically cause I'm not in London at the moment. I went to Wales over the bank holiday weekend and made sausage buns. Again. I used the same recipe as the last time and apart from the different designs, taste wise it was the same. I did add a slice of cheese to a few lucky buns.
I took some pictures of the garden and the bf's parents grow vegetables! Spring onions, chives, pak choy and choi sum. It's so pretty and you get loads of vegetables. To harvest, just cut it (not pull it out) and it regrows after a while. Cool huh. Shame they don't have fruit trees. I suppose after planting the vege, there isn't much space left for trees. Plus, fruit trees take years to bear fruit.
Ok, back to the sausage buns. I shouldn't really classify it as v2.0. Since it's pretty much the same. They do look different - maybe that justifies v2.0. Anyways, I used the braiding technique for some of the buns and they look really professional! Shame some of them stuck to the baking sheet. I take full responsibility though. It was only cause I did a poor job when brushing the egg wash on and it dripped everywhere - so some of the buns have mini holes at the bottom. Not noticeable unless you eat the bun upside down :)
I won't be baking much this week as I'll only be back in London on Monday. I have a mini assignment! How exciting. Basically back to testing out cupcake recipes for Y's wedding. Oh and have to look for a cake recipe too for her main cake. Oh and carry out a trial run. Hmm, sounds like a fair bit that needs to be done within 2 weeks. Actually, more like 10 days. There's no need to panic!!

Wednesday, 26 May 2010

Lemon zest cupcakes with vanilla frosting

I think I should refer these cupcakes as vanilla cupcakes v3.0. Compared to the first and second cupcake, it's way better than both of them combined! A bit nerve racking to make though because it involves egg whites and folding in. I tend to give up the folding bit after two folds and just stir vigorously, which I know is a big no no.
I can't remember where I got this recipe from but I think I did change it slightly when I was going through the whipping up the egg whites phase - changing most cake recipes, whipping up the egg whites and folding it into the batter. I remember using this recipe when I was back home, using double the recipe and baking it in a 9 inch square tin. The cake appeared dense but when it was actually really light.
I quite like practising piping. Other people's videos on how to pipe make it seem so easy but when you actually have a go, it turns out - ugly. Here's the recipe, double it for a 9 inch cake.

Lemon zest cupcakes with vanilla frosting
makes 10 muffin sized cupcakes

4 oz butter
1/2 cup sugar
1/4 tsp salt
4.5 0z flour
1 tsp baking powder
zest of one lemon
1/2 tsp vanilla extract

3 eggs (separated)
1/2 Tbsp lemon juice

1. Preheat oven to 170 C and prepare paper liners in muffin pan.
2. Cream butter and 1/4 cup sugar till fluffy. Add in the 3 egg yolks, one at a time. Mixing on low speed till combined.
3. Mix in flour, baking powder and salt till combined.
4. Add in lemon and vanilla extract.
5. In a clean, dry mixing bowl, beat egg whites, remaining 1/4 cup sugar and lemon juice with an electric mixer until stiff peaks form.
6. Add the beaten egg whites into the batter in 2 separate additions, each time folding gently with a spatula until just blended.
7. Fill up muffin liners till 2/3s full and bake in preheated oven for 15 minutes or a skewer inserted into the centre comes out clean.

Vanilla frosting

4 oz butter, at room temperature
1.5 cups icing sugar
1/2 tsp vanilla extract
1 Tbsp milk

1. Beat the icing sugar and butter together with a paddle attachment on medium-slow speed until the mixture comes together and is well mixed.
2. Turn the mixer down to slow speed. Combine the milk and vanilla extract in a separate bowl, then add to the butter mixture.
3. Once all the milk has been incorporated, turn the mixer up to high speed.
4. Beat until the frosting is light and fluffy, at least 3 minutes. The longer the frosting is beaten, the fluffier and lighter it becomes.

Friday, 21 May 2010

Caramel popcorn

YUMMY!! Popcorn with loads of caramel on it. Making popcorn is such an exciting event. Especially when you hear it popping away in the pot.

Homemade popcorn is really easy to make. Just heat up a pot, put some oil in and when it's hot enough, chuck the corn in and cover it with a lid. Wait for the pops and give it the odd shake every now and then and when the popping stops, it's done.
Whip up some caramel sauce, pour it on the popcorn, toss and bake it for a bit and tadaa, caramel popcorn! I can't remember where I got the recipe from. I think I combined 2 recipes together and added in baking soda to the caramel sauce cause other recipes seemed to have baking soda.

There was more than enough caramel! Every popcorn had at least a spec of caramel on it. I don't like it when half of the popcorn has no caramel on it, especially at the cinemas cause once the movie starts, you can't actually see which popcorn has caramel on it and which doesn't.

Caramel popcorn

1/4 cup vegetable oil
1/2 cup popping corn

1. Heat the oil in a large pan and add the popcorn. Cover and cook for 3-4 minutes, shaking the pan occasionally until the popping stops. Tip into a large bowl.

caramel sauce:

4oz butter
1/2 cup caster sugar
1/4 cup brown sugar
2 Tbsp honey
3/4 - 1 tsp salt
1/2 tsp baking soda
1/2 tsp vanilla extract

1. Preheat oven to 140 C . Line 2 baking sheets with parchment paper.
2. In a saucepan over medium heat, melt butter. Stir in sugars, honey and salt. Bring to a boil, stirring constantly. Boil without stirring for approximately 5 minutes.
3. Remove from heat and stir in baking soda and vanilla. (it'll appear foamy).
4. Pour over popcorn and mix well.
5. Place in 2 baking sheets and bake in preheated oven, stirring every 15 minutes, for 45 minutes or until golden. Remove from oven and let cool completely before breaking into pieces.

Thursday, 20 May 2010

Peanut butter and chocolate chip cookies

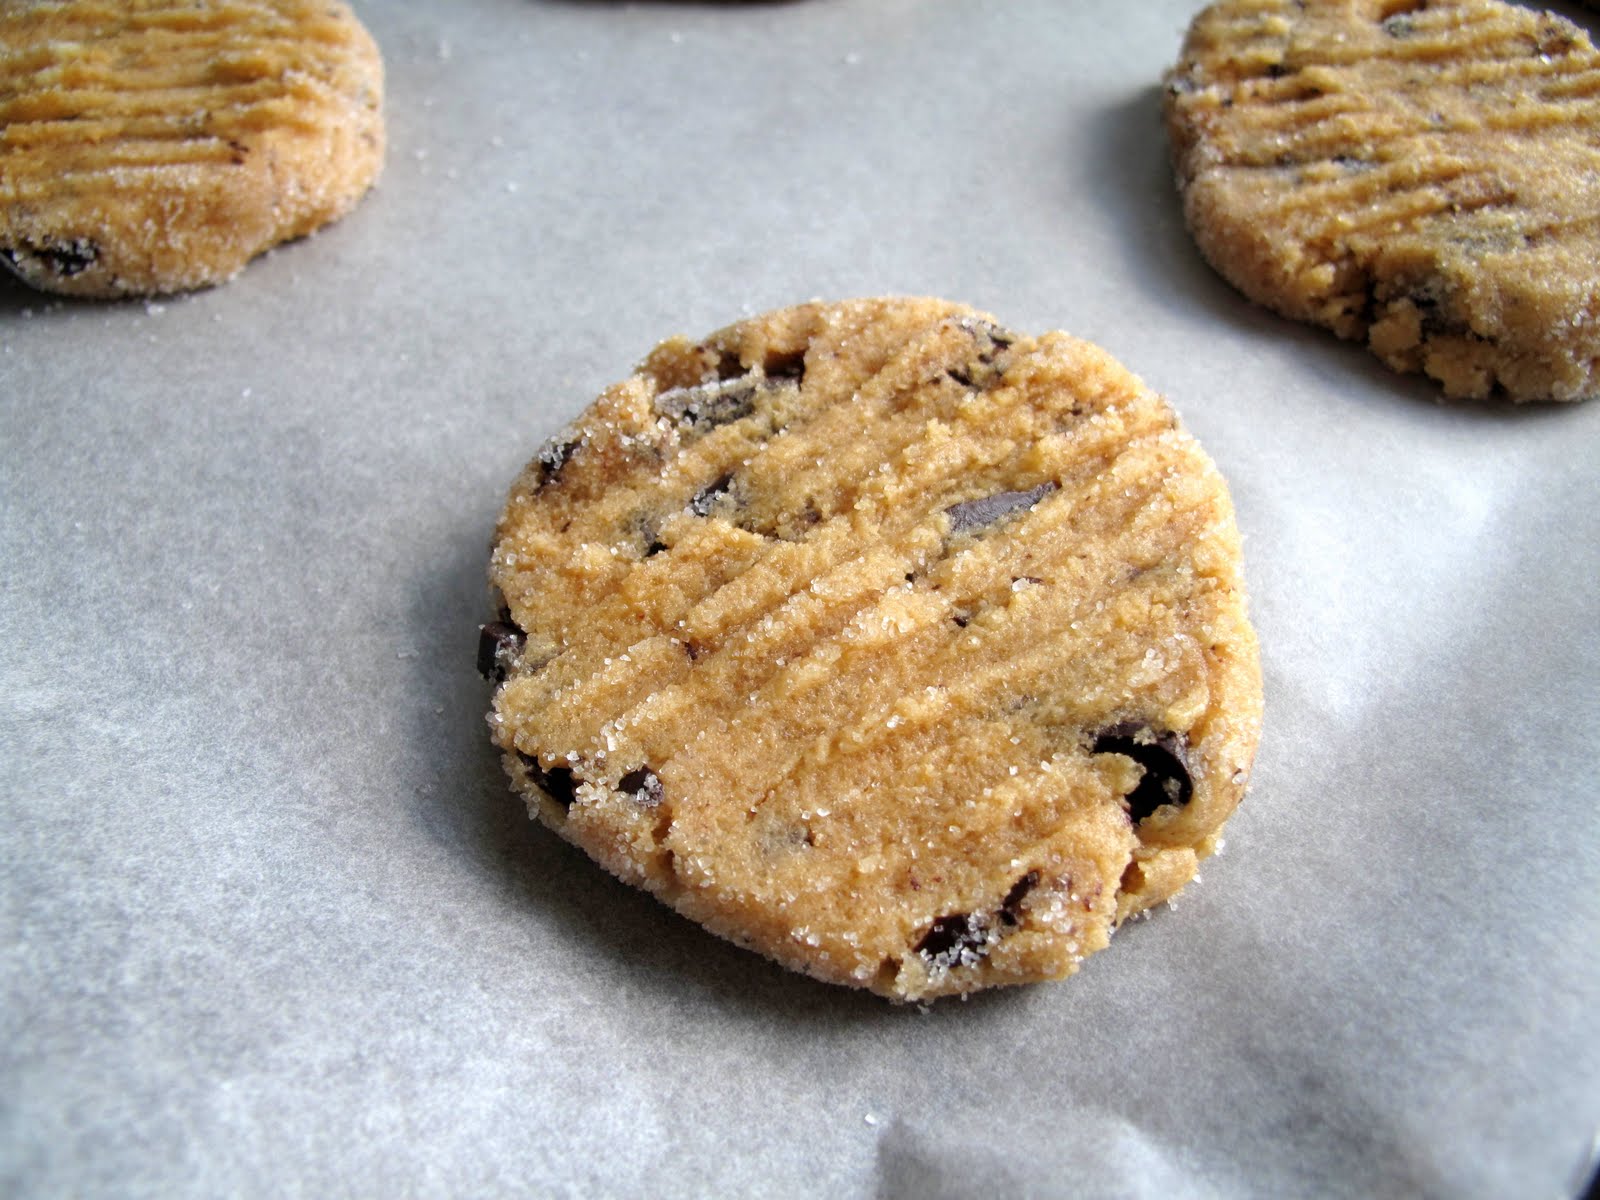
These cookies are YUMMM! It's the texture I'd like for chocolate chip cookies. Maybe minus a bit of the crumbliness. The peanut buttery-ness of this cookie is perfect. The cookie itself was a bit too sweet for me and not salty enough. I'd definitely increase the salt to 1/2-3/4 tsp next time.

I made giant cookies! Even bigger than the previous chocolate chip cookies. I'm getting use to making giant cookies. In the past, I use to scoop a teaspoon worth of batter. These days, it's at least a quarter of a cups worth. I have to admit, it makes scooping out the dough much quicker.
The dough is easy to handle and I quite like the effect of rolling the cookie dough in sugar and then using a fork to press it down. Ooh, maybe next time, I'd dip the cookies in chocolate too. Mmm.
Peanut butter and chocolate chip cookies from thecakemistress
makes 24 cookies (depending on size - I only ended up with 16)

4 oz unsalted butter, softened
1 cup peanut butter at room temperature (smooth or crunchy)
3/4 cup sugar
1/2 cup firmly packed light brown sugar
1 large egg, at room temperature
1 1/4 cups all-purpose flour
3/4 tsp baking soda
1/2 tsp baking powder
1/4 tsp salt
1 Tbsp milk
1 tsp vanilla extract
1 cup chocolate chips

For sprinkling: 1/4 cup caster sugar

1. Preheat oven to 180 C. In a large bowl, combine the flour, the baking soda, the baking powder, and the salt. Set aside.
2. In a large bowl, beat the butter and the peanut butter together until fluffy. Add the sugars and beat until smooth. Add the egg and mix well. Add the milk and the vanilla extract. Add the flour mixture and beat thoroughly. Stir in the chocolate chips.
3. Place sprinkling sugar on a plate. Using an ice-cream scoop or tablespoon drop cookie rounds into the sugar, then onto a sheet of baking paper. Be sure to leave 2-3 cm around each for expansion. You could also use a fork to indent the top with a pattern, but do not overly flatten cookies.
4. Bake for 10 to 12 minutes, until they change to light golden brown. Do not overbake. Cookies may appear to be underdone, but once they cool down they become firmer. Allow the cookies to cool on the sheet for 1 minute, then remove to a rack to cool completely.

Wednesday, 19 May 2010

Vanilla cupcakes with vanilla frosting

Vanilla cupcakes v2.0. I'm currently testing out recipes for cupcakes. It's interesting that there are so many types of recipes for the same end product. Different ratios, ingredients and methods - what a pain. Oh, and don't forget that each individual has a different preference too.

This recipe from the Hummingbird Bakery Cookbook was more promising than the previous vanilla cupcakes I made. I wouldn't declare this *THE* ultimate cupcake recipe so the search is still on!

The method for this cupcake is interesting - mix the butter with the dry ingredients, then add the wet ingredients. I made them muffin sized instead of cupcakes cause I think they look prettier and more proportionate when in muffin size. The beast did its job! The icing was smooth and easy to pipe. Really sweet though but I suppose that's what icing is suppose to be.
Vanilla cupcakes with vanilla frosting
makes 6 muffins or 12 cupcakes

4 1/2 oz plain flour
5 oz caster sugar
1 1/2 tsp baking powder
pinch of salt
1 1/2 oz butter
120 ml whole milk
1 egg
1/4 tsp vanilla extract

1 quantity vanilla frosting

1. Line cupcake tray and preheat oven to 170 C.
2. Put flour, sugar, baking powder, salt and butter in a mixer bowl and with a paddle attachment, beat on slow speed until you get a sandy consistency and everything is combined.
3. Gradually pour in half the milk and beat until just incorporated.
4. Whisk the egg, vanilla extract and remaining milk together in a separate bowl for a few seconds, then pour into the mixture and continue beating until just incorporated. Scrape down the bowl and mix until smooth. Do not overmix.
5. Spoon the mixture into the paper cases until 2/3s full and bake in the preheated oven for 20 to 25 minutes or until light and golden and the sponge bounces back when touched.
6. Leave the cupcakes to cool slightly in the tray before turning out onto a wire cooling rack to cool completely.

Vanilla frosting

9 oz icing sugar, sifted
3 oz butter, at room temperature
25 ml whole milk
a couple drops of vanilla extract

1. Beat the icing sugar and butter together in a free-standing electric mixer with a paddle attachment on medium-slow speed until the mixture comes together and is well mixed.
2. Turn the mixer down to slow speed. Combine the milk and vanilla extract in a separate bowl, then add to the butter mixture a couple of tablespoons at a time.
3. Once all the milk has been incorporated, turn the mixer up to high speed.
4. Beat until the frosting is light and fluffy, at least 5 minutes. The longer the frosting is beaten, the fluffier and lighter it becomes.

Monday, 17 May 2010

Chocolate chip cookies

It was raining most of yesterday so in an attempt to wait it out, chocolate chip cookies! I used a different chocolate chip cookie recipe from the Alton Brown's recipe I used the last time. Actually, the method is the same (using melted butter is always a plus for me when there's no mixer around). The only difference is the type of flour used and slightly different ratios.
This cookie was suppose to be chewy but again, more cake-y but it was crispy. I think it's probably the dark muscovado sugar that I've been using instead of brown sugar. Note to self - stock up on brown sugar.

I made these cookies bigger than the last time. I technically scooped the same amount of dough - 1/4 cup but I flattened them out before baking till they pretty much looked like burger patties. I experimented by varying the amount of flattening done and the last batch turned out the prettiest and by prettiest I mean flattest (without the silly dome in the centre). It was also the biggest, diameter wise (about 4 inches).
Chocolate chip cookies from smittenkitchen
makes 14 cookies (depending on size)

2 cups all-purpose flour
1/2 teaspoon baking soda
1/2 teaspoon salt
6 oz butter, melted
1 cup packed brown sugar
1/2 cup white sugar
1 tablespoon vanilla extract (I used 1 tsp)
1 egg
1 egg yolk
2 cups semisweet chocolate chips

1. Preheat the oven to 165 C (I baked mine at 175 C for 17 minutes). Grease cookie sheets or line with parchment paper.
2. Sift together the flour, baking soda and salt; set aside. In a medium bowl, cream together the melted butter, brown sugar and white sugar until well blended.
3. Beat in the vanilla, egg, and egg yolk until light and creamy. Mix in the sifted ingredients until just blended.
4. Stir in the chocolate chips by hand using a wooden spoon. Drop cookie dough 1/4 cup at a time (for giant cookies) or a tablespoon at a time (for smaller cookies) onto the prepared cookie sheets. Cookies should be about 3 inches apart.
5. Bake larger cookies for 15 to 17 minutes, or 10 to 12 minutes for smaller ones (check your cookies before they’re done; depending on your scoop size, your baking time will vary) in the preheated oven, or until the edges are lightly toasted. Cool on baking sheets for a few minutes before transferring to wire racks to cool completely.

Saturday, 15 May 2010

Earl grey tea cookies

Earl grey tea is one of the best teas ever! Although I don't actually drink much of it, the taste of it in cakes and cookies is YUMMY! It deserves to be awarded the capital letters. The cookies are really fragrant and the earl grey taste is not too strong but you can tell it's there.

Ice box cookies are really easy to make. I halved the recipe and it still turned out. Ignore the instructions if you don't have a food processor or a mixer. Just cut the cold butter up into chunks and use your fingers to rub the butter into the ingredients and add a bit of water at a time till a dough forms. Form a log, either round or square, chill it, slice it and bake it.
I tried to be neat and obtain a rectangle but that clearly failed. At least it's flat on 3 out of 4 sides. That's 75% of the cookie. Actually, it doesn't really matter cause when you bake it, the dough melts a little and it's as though there's extra gravity in the oven pulling the edges of your cookie down.

Earl grey tea cookies from realsimple
makes 6 dozen cookies (depending on size)

2 cups flour
1/2 cup caster sugar
1/2 cup icing sugar (I didn't have any icing sugar at hand and just used caster sugar)
2 Tbsp Earl grey tea (6 teabags worth)
1/2 tsp salt
1 tsp vanilla extract
8 oz butter

1. Pulse together all the dry ingredients in a food processor until the tea leaves are pulverized. Add the vanilla, 1 teaspoon water, and the butter. Pulse together until a dough is formed.
2. Divide the dough in half. Place each half on a sheet of plastic wrap and roll into a 12-inch log, about 2 inches in diameter. Wrap and chill for 30 minutes.
3. Slice each log into disks, 1/3 inch thick. Place on parchment lined baking sheets, 2 inches apart.
4. Bake in a preheated 190 C oven until the edges are just brown, about 12 minutes. Let cool on sheets for 5 minutes, then transfer to wire racks.

Related Posts with Thumbnails