Showing posts with label chocolate. Show all posts

Monday, 18 October 2010

Chocolate cupcakes

I can't believe that the last post was dated July. Gosh, it has been a while. I've been busy moving, waiting for the internet to be set up and time has just gone by. I have been baking but haven't really kept track of what I've made.

Here are some goodies that I made today. The cupcake is moist and I really like the texture - soft. I did put a square of cadbury's caramel chocolate but you can't really taste it. I did bung some chocolate chips in too just to add to the chocolate-y-ness.
It's funny how the cupcake can look so bare one minute and look so dressed up the next. Kinda like giving the cupcake a makeover! Look, I even added a mini star to dress it up more.
The frosting was such a disaster! I usually use ziplock bags and cut the corner off, place the tip in etc. I used about 6 different types of bags and they kept breaking. In the end, I taped all around the edges of the bag with masking tape and hoped for the best.

That really got on my nerves. Will post the recipe another time. It's sitting on the kitchen counter and I'm feeling really lazy to get up.

Wednesday, 16 June 2010

Wedding cake v3.0

Wedding cake v3.0!! The cake that has scored the most marks so far (compared to v1.0 and v2.0). Tomorrow is the real thing! THE wedding cake! Plus all the little cupcakes that will sit on the other tiers. Hope everything goes as planned and that nothing goes horribly wrong. Not that there is a detailed plan - just bake the 3 layers, bake the cupcakes and decorate the cake. Frosting the cupcakes shall be left to be done on Friday.

THE wedding cake won't look exactly like the above. It isn't going to have a red strip of paper from a magazine going around the cake and roses which were "borrowed" from the neighbour's garden on the top. I think I've got the ribbon and flowers technically covered.
The cake is pretty much the same as wedding cake v2.0 except that I put orange zest in it and a layer of strawberry jam on both sides of the chocolate layer. The zest and the jam makes the cake so fragrant when you slice it. The jam also adds the specs of red. Aww, it looks so pretty! Anyways, fingers crossed for tomorrows mission - THE wedding cake.

Monday, 14 June 2010

Wedding cake v2.0

Wedding cake v2.0. Same look, different recipe from wedding cake v1.0. I used the same recipe for the chocolate layer as the last time but for the vanilla layer, I tried the standard victoria sponge cake recipe where it's the 1:1:1:1 ratio of flour:butter:sugar:eggs. I think. Actually, I think I did cut down on the sugar. The vanilla layer wasn't as nice compared to the last time. It was really eggy and not as light.
I did make more frosting this time compared to the last time and put much more compared to the last time. Turned out way better and I used 1kg of fondant as opposed to 1/2kg the last time. It made such a difference. I actually had enough fondant this time to cover the cake plus a bit extra to make winnie the pooh & friends cut outs.

I did better than the last time but v3.0 should be coming soon.

Wednesday, 9 June 2010

Wedding cake v1.0

Trial version 1.0 of the wedding cake. Result - FAIL! Cake wise it was delicious but decoration wise - definitely a FAIL. First mistake - not having enough buttercream frosting to cover the cake. Second mistake - not having enough fondant to cover the cake.
It does look pretty though when you slice it and have a slice view. In general, from the top view it looks okay but from the sides, just plain hideous. I suppose the top wouldn't matter too much cause I'll be covering it with fresh flowers.
I don't really like the taste of fondant. I used the already made one. It tastes not really like food, more like plastic actually. I'll definitely need a thicker layer of frosting between the cake layers.

The chocolate layer cake is from Martha Stewart (minus the frosting). Really easy recipe and it's baked in one 8 inch baking tin. The cake was too dense and heavy for my liking though. The vanilla layers were from my previous post on vanilla cupcakes. Minus the lemon zest simply because I had no lemons. I'll probably use the vanilla cupcake recipe for the chocolate layer and just add a few tablespoons of cocoa powder.

Or maybe try out a whole different recipe for all the layers because the vanilla layer did shrink from the sides and wasn't too straight.

Easy chocolate cake from Martha Stewart
makes one 8 inch cake

6 oz butter
1 cup sugar
3 large eggs
1 tsp vanilla extract
3/4 cup cocoa powder
3/4 cup all purpose flour
1/2 tsp baking powder
1/4 tsp salt
1/2 cup sour cream

1. Preheat oven to 180 C. Butter an 8-inch round cake pan; line bottom with wax paper. Butter paper; dust with cocoa powder, tapping out excess; set aside (I didn't bother with this. I just buttered the pan, didn't even line it with baking paper and had no problems removing the cake).
2. In a medium bowl, sift together cocoa, flour, baking powder, and salt; set aside. In a mixing bowl, cream butter and sugar until light and fluffy. Beat in eggs, one at a time, then beat in vanilla. Reduce speed to low. Add flour mixture alternating with sour cream, starting and ending with the flour mixture.

3. Spread batter into prepared pan. Tap pan firmly on counter top several times to force out large air bubbles. Bake until a toothpick inserted in center comes out clean, 30 to 35 minutes. (mine took 38 minutes to bake). Remove from oven, Cool 10 minutes in pan, then invert onto a wire rack to cool completely (bottom side up).


Thursday, 20 May 2010

Peanut butter and chocolate chip cookies

These cookies are YUMMM! It's the texture I'd like for chocolate chip cookies. Maybe minus a bit of the crumbliness. The peanut buttery-ness of this cookie is perfect. The cookie itself was a bit too sweet for me and not salty enough. I'd definitely increase the salt to 1/2-3/4 tsp next time.

I made giant cookies! Even bigger than the previous chocolate chip cookies. I'm getting use to making giant cookies. In the past, I use to scoop a teaspoon worth of batter. These days, it's at least a quarter of a cups worth. I have to admit, it makes scooping out the dough much quicker.
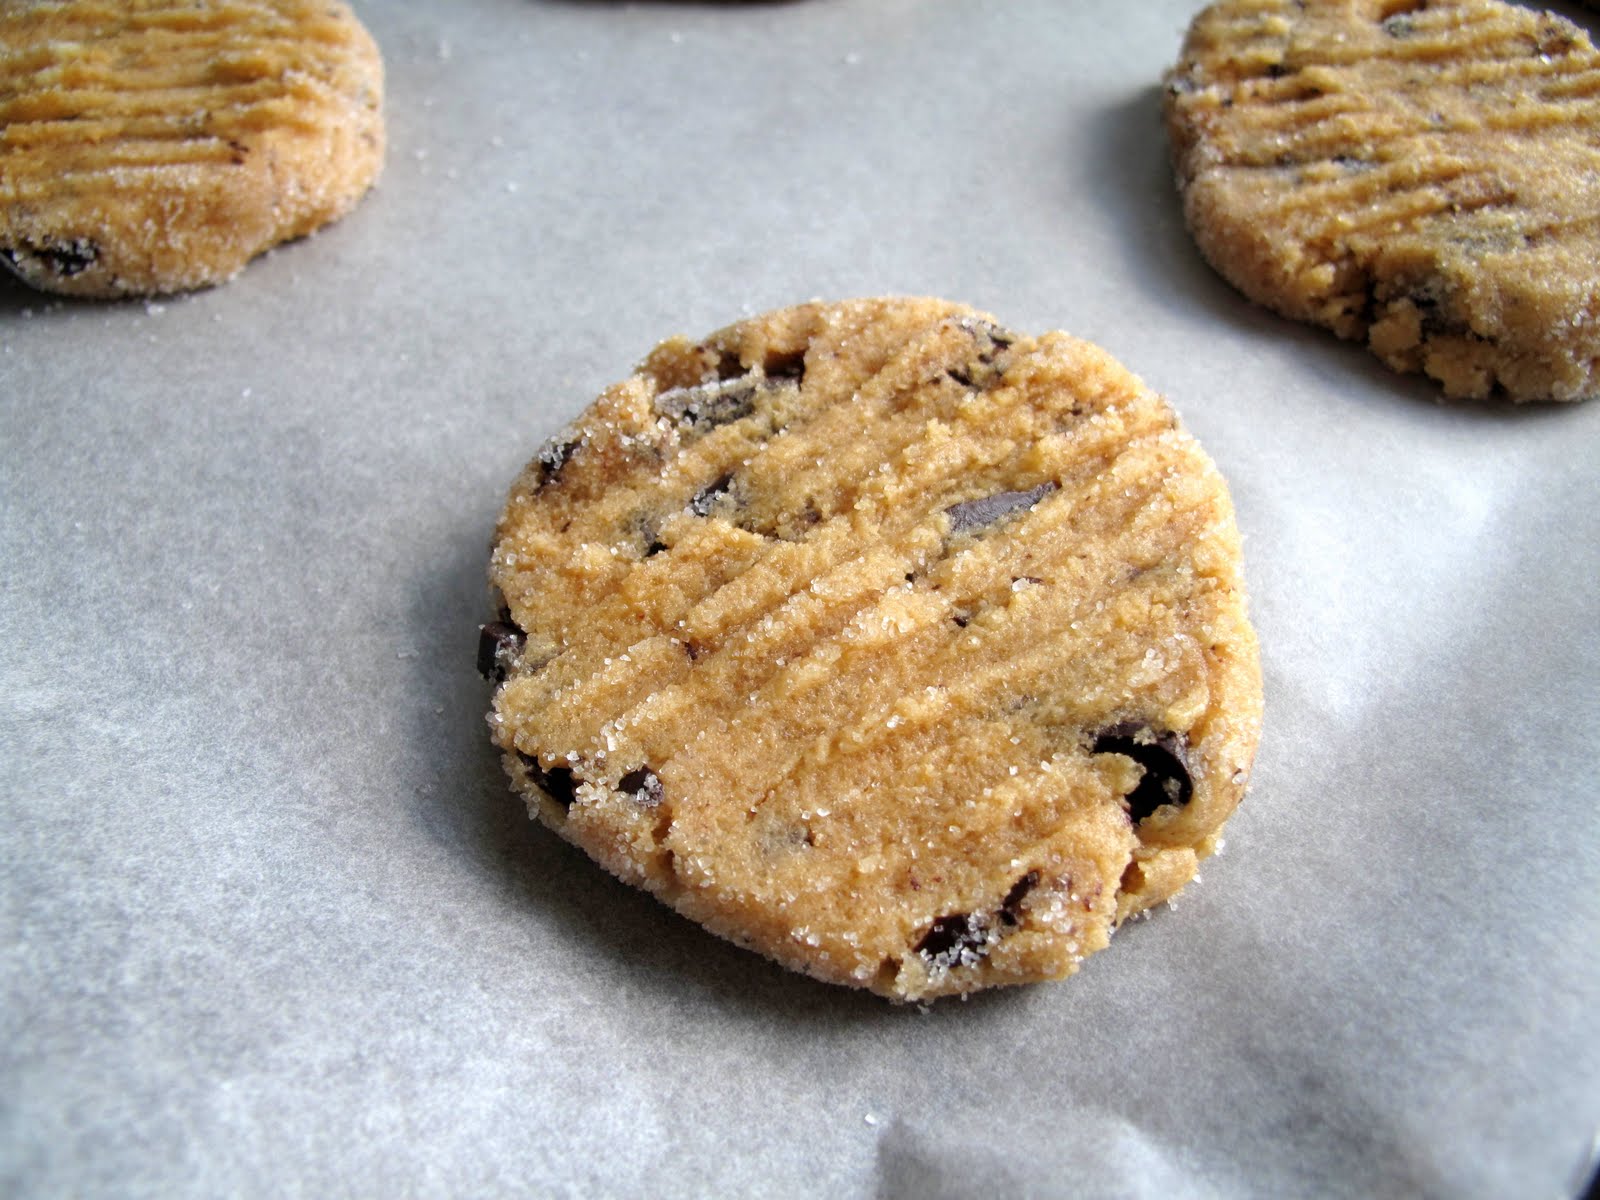
The dough is easy to handle and I quite like the effect of rolling the cookie dough in sugar and then using a fork to press it down. Ooh, maybe next time, I'd dip the cookies in chocolate too. Mmm.
Peanut butter and chocolate chip cookies from thecakemistress
makes 24 cookies (depending on size - I only ended up with 16)

4 oz unsalted butter, softened
1 cup peanut butter at room temperature (smooth or crunchy)
3/4 cup sugar
1/2 cup firmly packed light brown sugar
1 large egg, at room temperature
1 1/4 cups all-purpose flour
3/4 tsp baking soda
1/2 tsp baking powder
1/4 tsp salt
1 Tbsp milk
1 tsp vanilla extract
1 cup chocolate chips

For sprinkling: 1/4 cup caster sugar

1. Preheat oven to 180 C. In a large bowl, combine the flour, the baking soda, the baking powder, and the salt. Set aside.
2. In a large bowl, beat the butter and the peanut butter together until fluffy. Add the sugars and beat until smooth. Add the egg and mix well. Add the milk and the vanilla extract. Add the flour mixture and beat thoroughly. Stir in the chocolate chips.
3. Place sprinkling sugar on a plate. Using an ice-cream scoop or tablespoon drop cookie rounds into the sugar, then onto a sheet of baking paper. Be sure to leave 2-3 cm around each for expansion. You could also use a fork to indent the top with a pattern, but do not overly flatten cookies.
4. Bake for 10 to 12 minutes, until they change to light golden brown. Do not overbake. Cookies may appear to be underdone, but once they cool down they become firmer. Allow the cookies to cool on the sheet for 1 minute, then remove to a rack to cool completely.

Monday, 17 May 2010

Chocolate chip cookies

It was raining most of yesterday so in an attempt to wait it out, chocolate chip cookies! I used a different chocolate chip cookie recipe from the Alton Brown's recipe I used the last time. Actually, the method is the same (using melted butter is always a plus for me when there's no mixer around). The only difference is the type of flour used and slightly different ratios.
This cookie was suppose to be chewy but again, more cake-y but it was crispy. I think it's probably the dark muscovado sugar that I've been using instead of brown sugar. Note to self - stock up on brown sugar.

I made these cookies bigger than the last time. I technically scooped the same amount of dough - 1/4 cup but I flattened them out before baking till they pretty much looked like burger patties. I experimented by varying the amount of flattening done and the last batch turned out the prettiest and by prettiest I mean flattest (without the silly dome in the centre). It was also the biggest, diameter wise (about 4 inches).
Chocolate chip cookies from smittenkitchen
makes 14 cookies (depending on size)

2 cups all-purpose flour
1/2 teaspoon baking soda
1/2 teaspoon salt
6 oz butter, melted
1 cup packed brown sugar
1/2 cup white sugar
1 tablespoon vanilla extract (I used 1 tsp)
1 egg
1 egg yolk
2 cups semisweet chocolate chips

1. Preheat the oven to 165 C (I baked mine at 175 C for 17 minutes). Grease cookie sheets or line with parchment paper.
2. Sift together the flour, baking soda and salt; set aside. In a medium bowl, cream together the melted butter, brown sugar and white sugar until well blended.
3. Beat in the vanilla, egg, and egg yolk until light and creamy. Mix in the sifted ingredients until just blended.
4. Stir in the chocolate chips by hand using a wooden spoon. Drop cookie dough 1/4 cup at a time (for giant cookies) or a tablespoon at a time (for smaller cookies) onto the prepared cookie sheets. Cookies should be about 3 inches apart.
5. Bake larger cookies for 15 to 17 minutes, or 10 to 12 minutes for smaller ones (check your cookies before they’re done; depending on your scoop size, your baking time will vary) in the preheated oven, or until the edges are lightly toasted. Cool on baking sheets for a few minutes before transferring to wire racks to cool completely.

Thursday, 13 May 2010

Chocolate chip cookies

I just made the biggest chocolate chip cookie ever! Ok, I might be exaggerating a bit but they are gimongous! I used Alton Brown's chewy chocolate chip cookie recipe - a fairly easy recipe and doesn't require much effort.

I only deviated slightly from the recipe, using dark muscovado sugar instead of brown sugar. Everything else was done to the T. I even used the recommended bread flour. The cookie is very chocolate-y and it got annoying because everytime I pick a cookie up, I get a smear of chocolate on my fingers.
I didn't find the cookie chewy. It was more cake-y. I was pleased with the crispiness around the edges though. My cookie looks nothing like the picture on the food network channel! Theirs is flat and even whereas mine turned out like a dome. Maybe that's the centre bit was cake-y. Or maybe my definition of chewy is different? Oh well.
I chilled the dough for 3 hours and it looks so pretty when scooped out. I scooped out 1/4 cup balls of dough and baked a dozen cookies. I baked the leftover dough the next day and made slightly smaller ones and mini ones. They're actually only mini when compared to the first batch. It reminds me of the coffee sizes at Starbucks - tall, grande and venti.
Chocolate chip cookies by Alton Brown
makes 2 1/2 dozen cookies

8 oz butter
1/4 caster sugar
1 1/4 cup brown sugar
1 egg
1 egg yolk
2 Tbsp milk
1 1/2 tsp vanilla extract
2 1/4 cups bread flour
1 tsp salt
1 tsp baking soda
2 cups chocolate chips

1. Melt the butter in a heavy-bottom medium saucepan over low heat. Sift together the flour, salt, and baking soda and set aside.
2. Pour the melted butter in the mixer's work bowl. Add the sugar and brown sugar. Cream the butter and sugars on medium speed. Add the egg, yolk, 2 tablespoons milk and vanilla extract and mix until well combined. Slowly incorporate the flour mixture until thoroughly combined. Stir in the chocolate chips.
3. Chill the dough, then scoop onto parchment-lined baking sheets, 6 cookies per sheet. Bake for 14 minutes or until golden brown in , checking the cookies after 5 minutes. Rotate the baking sheet for even browning. Cool completely and store in an airtight container.

Related Posts with Thumbnails